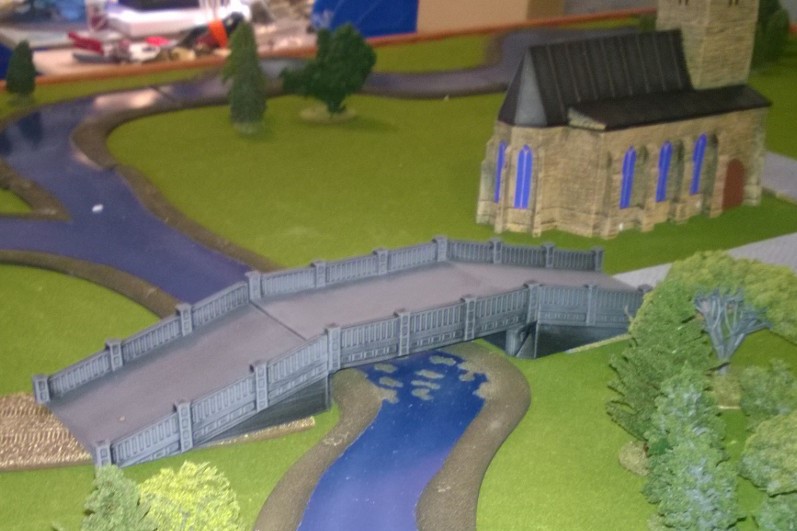
This bridge was originally designed to be made in 28mm. Scaling it down to 15mm was very simple since it only required a little bit of adjustment to the basic design. We plan to make it in a 3inch wide version (the one shown) and also eventually a 6inch wide one. Because of the modular design, you can make the bridge as long or as short as you need by simply adding or removing the extension sections.
The basic bridge consists of only three pieces, two abutments (the end pieces), and a span section. To this you can add as many extension spans as you want to achieve whatever length you desire. The Support Pier is a separate piece from the Extension Span so that it can also easily be changed.
For the 6” version of the bridge we will also make some ramp extensions. These will give you the option of raising the height of the bridge if you want one of those really big ones.
The design is very versatile and can easily be adapted to represent many types of bridges. Originally we were planning to make a series of trusses to go along with the bridge. However, HO scale rail road trusses are already available in so many different styles that it now seems redundant.
Eventually we will also make damaged and destroyed sections. These sections will just fit into the bridge in the same way as the undamaged ones so that it will be easy to degrade the condition of the bridge during a game by simply swapping out pieces.

Unfortunately, we have been experiencing problems with our 3D printer. Otherwise, the bridge would have been completely finished by now. The first problem is that our printer extruder seems to clog whenever we print on a finer setting. Consequently, the prototype is a little bumpy due to having to use a faster, less detailed mode of printing.
The second problem is that we don’t yet have a heated printing bed. The corners of the bridge cool at a faster rate than the rest of it causing them to curle up a little. It isn’t too noticeably visibly on each individual piece, however it plays havoc with the joints between pieces, and makes it a waste of time to try making a mold of them.
The third problem is that our printer doesn’t like printing really small areas. The top corners of both Abutment sections have a hole in them where the surface area was too small to print properly. Despite all of these problems, we are very excited about this bridge. We already have some solutions in the works, so it shouldn’t be much longer until we get a final product. If you have any suggestions about this project, please let us know in the comments!


